Each string of
hearts is crocheted with one continuous thread, which makes the whole
process of creating this garland so much easier and faster
and fun, comparing
with individually made hearts sewn together!
There can be so many
uses for these cute hearts: a garland, a hat or headband or pillow
or handbag embellishment, a bracelet, a coffee cup of mug cozy, a
bookmark...
I used G-6
/4.25mm hook and small amounts of Worsted Weight
yarn/Afghan/Aran/10ply to make hearts about
1.5 by 1.5
inches/3.5-4cm each,
and a string of 6
hearts is about 9-9.5 inches/23-24cm long and weighs about 5g
ABBREVIATIONS
st(s) =
stitch(es) ch = chain stitch
sl st = slip
stitch dc = double crochet stitch
Special stitch
= chain 1, insert the hook through the top 2 loops of the double
crochet stitch and pull the yarn through all 3 loops on the hook (see
pictures below)
Leaving a long yarn
tail (for attaching the garland), crochet a chain with the number of
stitches multiple by 6. After completing last heart, leave a long
yarn end, cut the yarn and take it out of the loop.
For a string of 6
hearts, chain 36 stitches (the loop on the hook
does not count as a stitch). There will be the top halves of the
hearts on one side of the chain, and the bottom halves on the other
side of the chain.
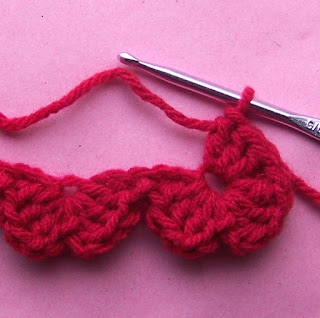
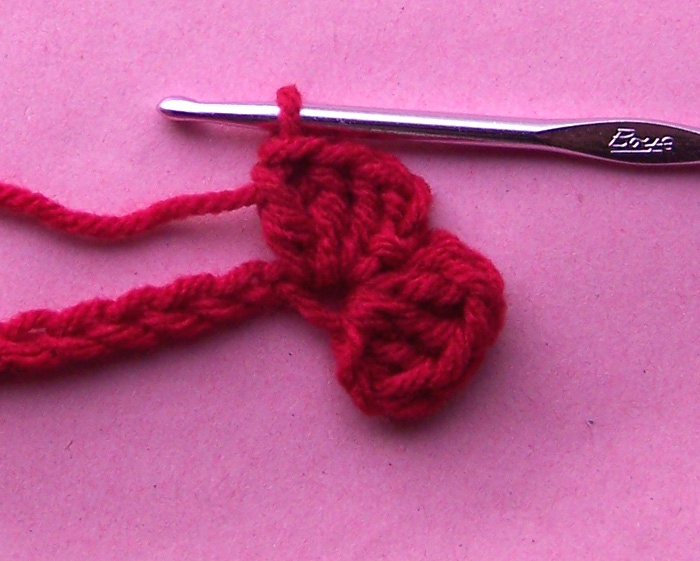
Row1 (top
half of heart): into the 3rd from the hook loop crochet
{3dc, ch2, sl st, ch2, 3 dc}, * skip 2 ch sts, sl st in next st,
skip 2 ch sts, crochet in next stitch {3dc, ch2, sl st, ch2, 3 dc};
repeat from * to the
end of the chain, sl st in the last chain st.
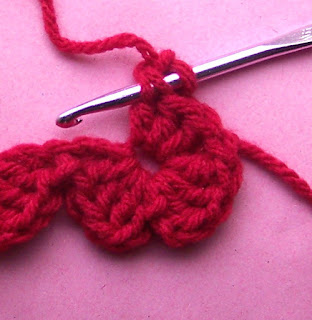
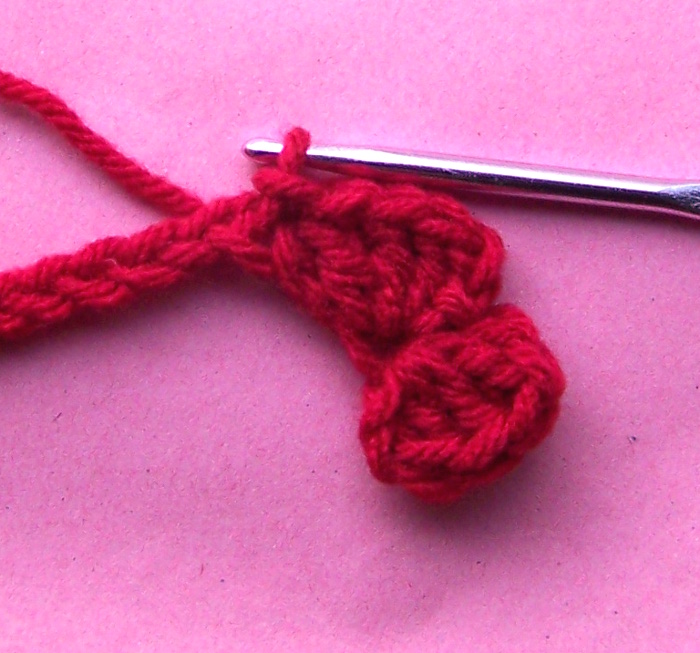
Row2 (bottom
half of heart): rotate the work clock-wise and in the first hole made
by dc stitches crochet {3 dc sts, special st, 3 dc sts}, sl st in sl
st between the hearts, in the next hole
crochet {3 dc sts,
special st, 3 dc sts}, sl st in sl st between the hearts; make 6
bottom halves, finish with sl st in the first dc st of Row1.
Variations:
instead of 3 dc sts crochet 2
dc sts for both top and bottom sets of stitches; instead of 2 ch sts
crochet 1 ch st


Good luck with all your projects!


Good luck with all your projects!